
If you have an active Union Metrics subscription, you have access to our projects functionality.
Our projects feature allows you to organize and selectively share Trackers, as well as manage user access to those Trackers. After enabling projects, you can organize Trackers in your account into separate projects, view project-level dashboards, and invite guests and other users to view and/or edit those Trackers on a project-by-project basis. Create projects to:
- Group related Trackers together
- Share select Trackers with clients or colleagues
- Manage user access and permissions
- Create guest access for one or more Trackers
- View project-level dashboards to get insights and trends for just those Trackers
Enabling Projects
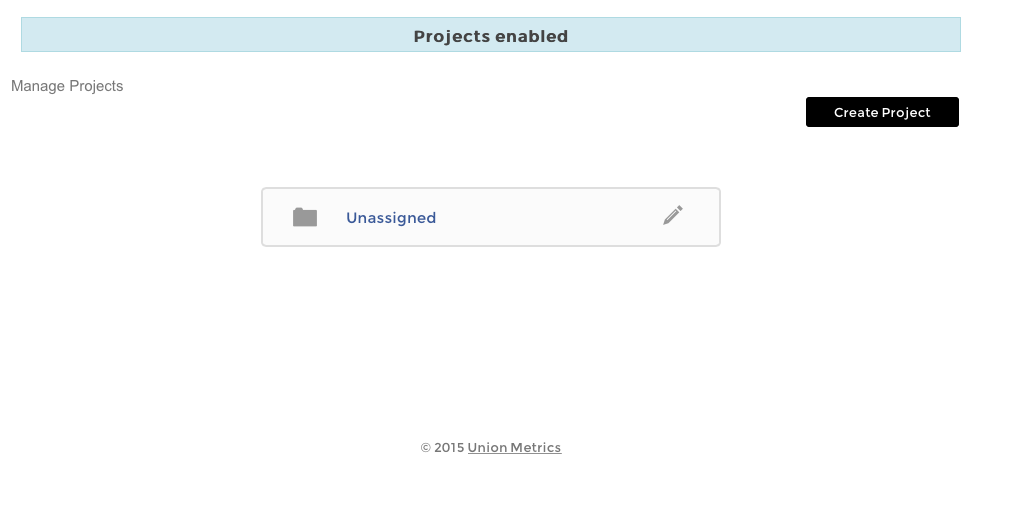
The projects feature is optional for all Union Metrics subscribers, so you'll need to enable it if you want advanced sharing and user permissions. To enable projects, click the gear icon in the top right corner of your Union Metrics account, and select Manage Projects.

By default, when you first enable projects, any existing Trackers will be in a global project named Unassigned. From here, you can create new projects, and move Trackers into them from the unassigned project. You can also add users to projects.
The unassigned project contains all Trackers that are not specifically assigned to another project. Each Tracker can only be assigned to one project at a time, but you can move them whenever you'd like.
Creating a New Project
To create a new project, go to your Manage Projects page (under the gear icon in the top right corner). Then click the Create Project button.
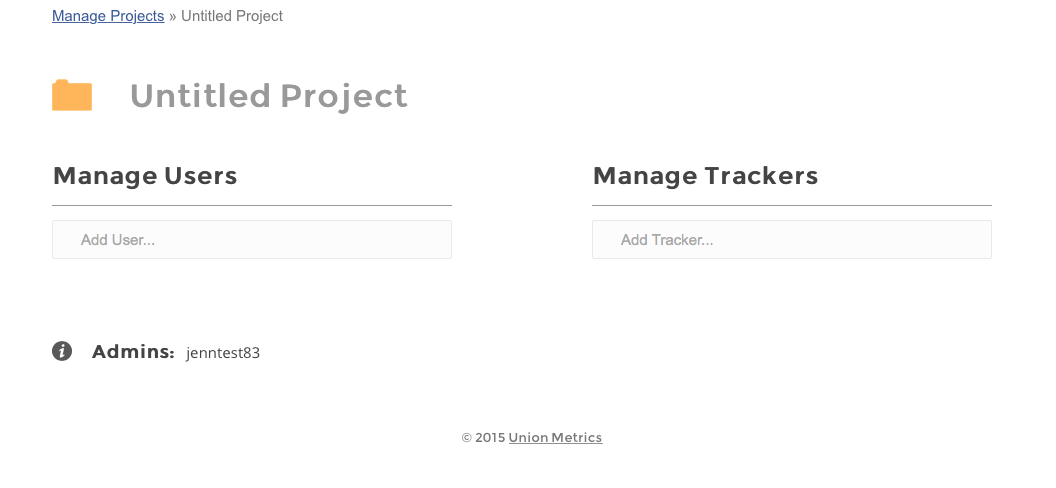
First, name your project. Everyone with access to this project will see this name. Click on the Untitled Project text to edit. You can also select what color folder icon you want - just click on that folder to select from a set of colors.
Next, choose one or more users to have access to this project. Click in the users box and start typing; it will show you a list of available users to add to that project. Admin users will automatically have access to all projects you create. You can add other existing users to a project, and give each of them access to view only or view and edit the Trackers in that project. If you want to add a new user to this project who does not yet have access to your subscription, you can add those users in the Manage Users section (also under the gear icon where you Manage Projects), and then add them to projects. Users can be associated with multiple projects.
Then, add one or more Trackers to your project. Click in the Tracker box and start typing; it will show you a list of all available Trackers to add to that project. Select each Tracker you'd like to add to that project. You can add as many Trackers as you like to a project. Each Tracker can only be in one project, so adding a Tracker to a new project will remove it from its previous project.
Finally, save your newly created project. You can edit these settings at any time.
Managing User Permissions
You can add existing users or invite new users to a project at any time. Users can have read and/or write access to projects and each user can be assigned to unlimited projects.
User types:
- Admin - Has access to user and project management, all Trackers (does not have billing access)
- Standard User - Has access to only the projects, Trackers the owner or admin assigns
Adding New Trackers to Projects
Your total number of available Trackers will not change after enabling projects. So, as long as you have available Trackers, you can add new ones to your projects.
Once you've created one or more projects, you can create a new Tracker in any of your projects. One the Tracker edit page, you'll get a drop-down menu with a list of your available projects. Remember you can always move them later.
Managing Your Projects
You can edit your projects anytime. You can add, move or remove Trackers from a project, change the users associated with a project, and edit the name of a project. To edit a project, click on the gear icon in the top right corner, then click on Manage Projects. Then click on the project title you want to edit.
Comments